by Igor | Jun 4, 2015 | Linux
How to create your own squid proxy server with Azure and Ubuntu OS.
Squid is a proxy server for caching and filtering web content .
Squid proxy service will cache the requested web-content and re-using it for the further request of the same content.You can also hide your real IP with squid and access content usually forbidden for your country or IP address.
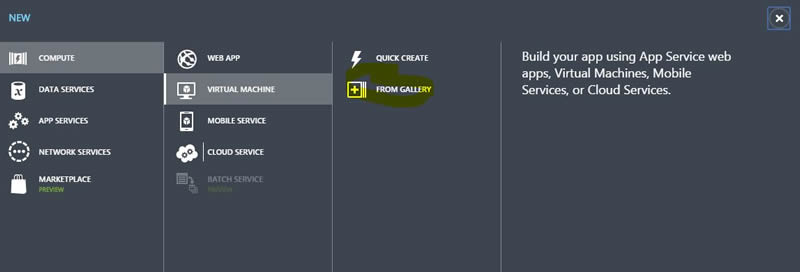
1.) Sign in to your Azure Portal and create VM
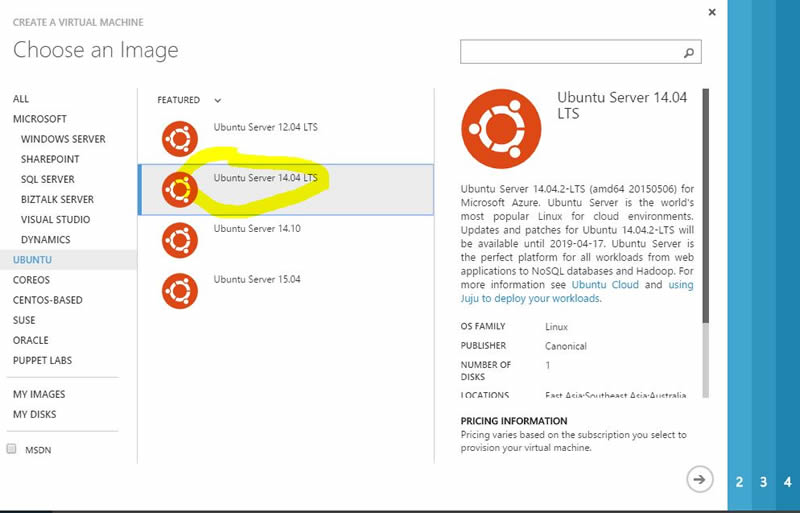
2.) Choose Ubuntu Server 14.04 LTS
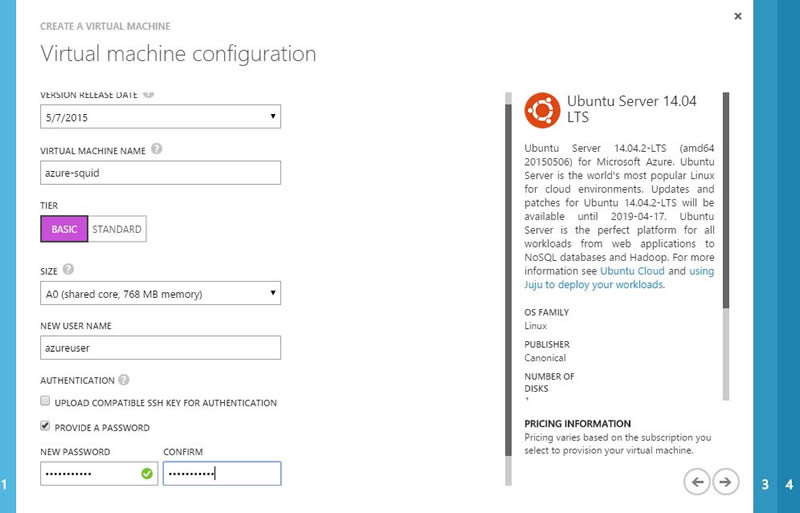
3.) Configure your VM
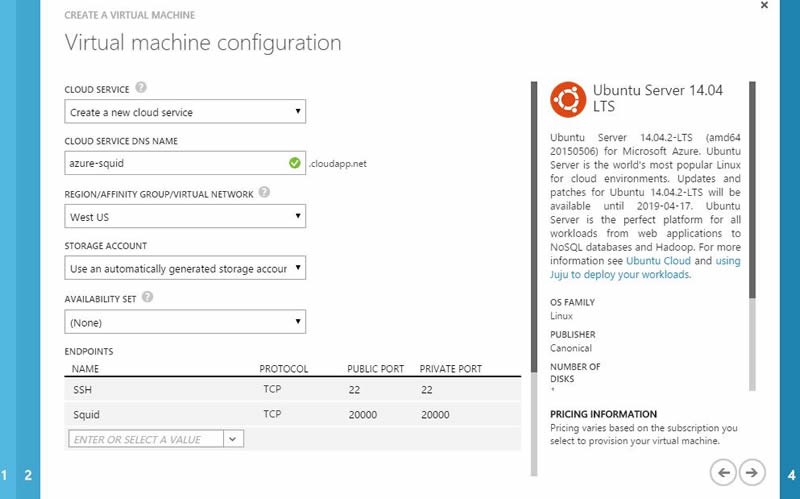
4.) Create endpoint higher then 1024 for example 20000
5.) Connect with putty to install and configure squid
sudo apt-get install squid -y
cd /etc/squid3
Make backup of default configuration just in case…
sudo cp squid.conf squid.conf.bak
Remove default configuration
sudo rm -rf squid.conf
Create and open new configuration in nano (you can use any other editor)
sudo nano squid.conf
Paste this 2 lines of code into your new configuration file
http_access allow all
http_port 20000
Save configuration
6.) Restart squid service
sudo service squid3 restart
7.) To check your connection use telnet IP on port defined in your squid configuration.
In this case 20000
telnet IP 20000
Your proxy server is ready if your connection was successiful.
Setup your OS to use this proxy server and go to http://whatsmyip.org to check your new IP address.
by Igor | May 28, 2015 | Linux
How to install Apache OpenOffice 4.1.1 on Ubuntu and Debian – 32 bit OS
First thing is to remove the already installed versions of either openoffice and libreoffice:
$ sudo apt-get remove libreoffice* openoffice*
$ sudo apt-get autoremove
Next, we will download openoffice, extract the archive and install the deb packages:
$ wget sourceforge.net/projects/openofficeorg.mirror/files/4.1.1/binaries/en-US/Apache_OpenOffice_4.1.1_Linux_x86_install-deb_en-US.tar.gz
$ tar -xzvf Apache_OpenOffice_4.1.1_Linux_x86_install-deb_en-US.tar.gz
$ cd en-US/DEBS
$ sudo dpkg -i *.deb
$ cd desktop-integration
$ sudo dpkg -i *.deb
How to install Apache OpenOffice 4.1.1 on Ubuntu and Debian – 64 bit OS
First thing is to remove the already installed versions of either openoffice and libreoffice:
$ sudo apt-get remove libreoffice* openoffice*
$ sudo apt-get autoremove
Next, we will download openoffice, extract the archive and install the deb packages:
$ wget sourceforge.net/projects/openofficeorg.mirror/files/4.1.1/binaries/en-US/Apache_OpenOffice_4.1.1_Linux_x86-64_install-deb_en-US.tar.gz
$ tar -xzvf Apache_OpenOffice_4.1.1_Linux_x86-64_install-deb_en-US.tar.gz
$ cd en-US/DEBS
$ sudo dpkg -i *.deb
$ cd desktop-integration
$ sudo dpkg -i *.deb
Optional to remove Apache OpenOffice 4.1.1 on either 32 bit or 64 bit Ubuntu and Debian, do
$ sudo apt-get remove openoffice*
To start OpenOffice 4.1.1 from terminal use
$ openoffice4
That’s it!
by Igor | May 27, 2015 | Linux, Odoo
Sometimes you may encounter an error in development or production [Errno 98] Address already in use.
This error is due to openerp-service or some other service already use port defined in your Odoo config.
You could try to change the port 8069 to any other port and restart the server but that’s not the right way.
Just apply the command
sudo ps aux | grep openerp
which will show you the port on which openerp server is in running state.
Then kill the specific process.
sudo kill -9 id
For example sudo kill -9 999
Restart odoo server and that’s it.
by Igor | May 26, 2015 | Linux
By default sudo remembers your password for 15 minutes.
Disable sudo timeout with this command:
sudo sh -c 'echo "\nDefaults timestamp_timeout=-1">>/etc/sudoers'
To re-enable sudo timeout use this command:
sudo sed -i "/Defaults timestamp_timeout=-1/d" /etc/sudoers
You can also change or disable sudo timeout with visudo.
sudo visudo
This opens an editor and points it to the sudoers file — Ubuntu defaults to nano, other systems use Vi.
To the defaults line, add :
timestamp_timeout=2
So it will look like this:
Defaults env_reset,timestamp_timeout=20
You might want to read the sudoers manual pages for additional information.
man sudoers
Recent Comments